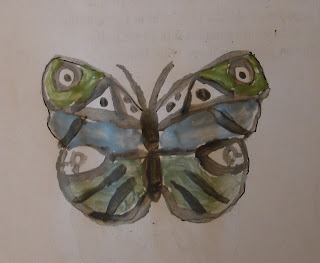
Last night I thought about embellishing the butterflies on the wall pocket I slipped yesterday. So I started out practicing with an outline of a butterfly drawn on a scrap of paper. I practiced with the three different colors of slip I made: ivy green, sky blue and best black. I made the colored slip by mixing mason stains into slip which was made from the same clay body I have used for the pieces I created.

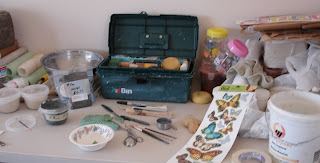
For the outline of the butterfly on the wall pocket, I used stickers I purchased from the dollar store. I got the idea of using stickers from Lori's blog, Fine Mess Pottery. I place the stickers where I want the clay color to remain, then I paint the colored slip over the whole piece. When the slip dries, I peel off the sticker and put it back on the paper it came on. I found out I can wipe the slip off the sticker and re-use the sticker. Talk about recycling.

As I was embellishing the butterflies, I was wishing I had more colors to play with, maybe yellow or orange, but I want to see how these colors turn out before investing in any more colors. Very little slip is needed to paint the lines and circles on the butterflies which means the slip will last a very long time. I think my painting on paper is better than it is on the clay, but I like the butterflies on the wall pocket better than just the plain white color of the clay showing through.
What do you think about my just putting clear glaze on the inside of the pocket and leaving the outside slipped but not glazed? That way water could be put inside but the outside would remain the muted color it is now? Of course, I don't really know what the Cone 10 temperature will do to the color, it may be a lot darker when it gets fired or it may burn out or flake off. Hope not though.

While I was working in my studio, I created quite a mess with paint brushes, tubs of slip, paper bowls with more slip in them, and on and on. I guess sometimes you have to make a mess to be creative. As I was painting away, a huge squall of rain, sleet, and hail was erupting outside.

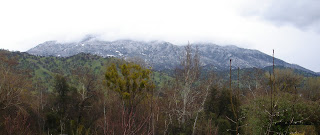
When I left the studio I saw Black Mountain has snow down to the 2,000 foot elevation. The top of Black Mountain is obscured by clouds. Black Mountain has one of the finest groves of Giant Sequoia throughout the range of Big Trees. From my house I can see the outline of the Giant Sequoia trees on the top of Black Mountain even though the mountain is about five miles away. That gives you an idea of the size of these trees. To visit the Giant Sequoias is a very humbling and awesome experience. My elevation is 1,000 feet, I wonder if we will have any snow in the morning?

Hello Linda,
ReplyDeleteI made some blue slip bowls and covered the inside with a clear glaze and left the outside bare. When fired at cone 10, the blue under the clear glaze was much darker than the bare slip. It looks like the blue got richer (and darker) under the glaze, but faded without.
I'm curious to see how your pockets turn out :)
Linda, the embellished pocket looks great! I liked the plain white, but I think it is even better with the deco. I vote to clear glaze the whole thing, but I do not have much experience with colored stains/slips.
ReplyDeleteHi Mel, thanks for the info, ideally I would do a test, but we don't do that many Cone 10 firings and it would then take me forever to get it from a firing.
ReplyDeleteDo you recall if there was much difference between the bisque color of the outside of your bowl and the Cone 10 color of the outside of your bowl? I am only going by what I read that Cone 10 enhances the color, which would make me think the bisque will appear much lighter in color till it is fired to Cone 10.
Hi Jerry, thanks, I am kind of waffling back an forth. If I glaze the whole thing I would have to keep it off the kiln shelf and would want to glaze the whole piece front and back so I will probably have to get some Cone 10 stilts, which I could use for other firings too.
Hi Linda, if you look here: http://1.bp.blogspot.com/_PH7y6oVKbNU/SY9E9548BSI/AAAAAAAAAJc/RBkcf7jSA-g/s1600/20090208_072.JPG the blue bowls in the middle are the ones I was taking about. If I remember correctly the blue slip, when it dried, was much richer. It might not have been that drastic with the blue slip, but the green slip was a big difference with clear glaze over it. Kind of dull.
ReplyDeleteHi Linda - belated thanks for the comment on design-realized!
ReplyDeleteI think they look great, but I'm not any help on the firing. Good luck! :)
ReplyDeleteI never fire to cone 10 so I don't know what will happen. At cone 5 I have seen the slip colors get more vivid even with no glaze. The view from your house is spectacular. What a place!
ReplyDeleteMy responses just got lost in cyberspace.
ReplyDeleteHi Mel, thank you so much for posting this information. I see what you mean about the lighter colors especially the green. I may just have to use the clear over the whole thing. I just love that bowl with the swirley green in the bottom, what a spectacular color.
Hi Julie, nice to see you here. I have some nickle and frit 3134 waiting in the wings to follow in your footsteps over some glazes on pinch bowls. I just love your work, keep posting your results and I'll do the same. I'll let you know about my experiments with the above.
Hi Ben, thanks I hope they turn out, I see there is a whole lot of testing necessary in working with clay.
Hi Barbara, I'm planning on taking photos of the bisque and the glaze firing to make some comparisons and document results. The views are wonderful here, we are really lucky to live here, thanks.
Great idea about using the stickers, Linda!!
ReplyDeleteThe pocket turned out really well with the slip painted butterflies - I look forward to seeing them glazed!
Hi Cynthia, thanks, I can't take credit for the idea, I learned it from Lori. I tried it on some cups last and the stickers wouldn't stick probably due to the large size of the sticker and the roundness, so it will only work on certain things. I missed this bisque firing. Will try to bisque them in my kiln this weekend and then take to class to high fire soon hopefully.
ReplyDelete