Thursday, January 29, 2009
How Will I Hang It?
Today I made a wall hanging using textured strips of clay. I'm using B-Mix porcelain clay and this piece is about 9 inches wide by 8 inches tall.
After I finished I wondered how I would hang it. (Sometimes I just don't plan ahead). Since the piece is still moist, I have time to insert some holes. I could put a hole on either end and then I would be able to use nails, making it more industrial looking. Or I could leave it as it is and mount it on board with epoxy. Another way would be to epoxy a couple of strips of wood hidden on the reverse and insert screws and use picture hanging wire. That's an idea I got from Meredith, of WhyNot Pottery blog, and I really like that method since all the hanging mechanisms are hidden from view and the focus is on the art.
What do you think? Do you have any ideas for me? If this makes it through the drying and firing, I plan on making some more wall hangings, so any ideas of how to hang wall pieces would be appreciated. I'll take my camera with me to class tonight, perhaps my instructor will have some advice. Toodles.
Wednesday, January 28, 2009
Won Ton Burrito?
Gary came home and said what is it? I said I don't know. He called it a burrito. After I pinched the ends together, it looked more like a won ton burrito.
I started today with lots of ideas and energy to match. After several distracting phone calls and mishaps, I decided to plunge ahead anyway and do some work in the studio. Time was getting short, so I thought I'd try making a juice cup using a technique I saw on Ceramic Arts Daily. I cut dowels I purchased hoping to try Mitch Lyons' hand building technique of making cylinders with a broomstick method.
Earlier, I reviewed the video on Ceramic Arts Daily and it looked so easy. I cut all the various sizes of dowels with the chop saw. As I was cutting the dowels, I was thinking my oftentimes visible seams would be non-existent. Right? wrong! It turns cutting the dowels was the easiest part.
First I cut myself a rectangle of clay, inserting the smallest dowel in one end halfway through as Mitch described in the video and inserting the dowel in the other end hoping to meet the hole in the middle. The first attempt I missed. So I tried again. The next one I did it, but in the end the cylinder was lopsided. The cylinder walls were thin on one side and thicker on the other. So I tried one more time. Same thing, thin on one side, thick on the other. After three attempts, (which I crushed) at making a nice even walled cylinder, I finally pinched the ends of the final cylinder together and called it day. I did get a nice bowl of slip made, perhaps I can use the slip as a sauce on the won ton burrito. Tomorrow is another day.
Tuesday, January 27, 2009
Binky Likes Coffee !
Although I put my coffee cup on the floor so I could show you my my cat drinking coffee, there is real truth in this fact: Binky Likes Coffee ! I can't remember exactly when I discovered this fact, but it was many years ago for sure. I usually have two cups of coffee in the morning and as things sometimes happen, I'm occasionally distracted away from my cup.
When Binky was a teenage cat, more than 8 years ago, I left my coffee cup on the coffee table in the living room for some reason or another. Later, I came back into the room to find Binky "drinking" his coffee. Binky drinks his coffee in a unique way. He dips his paw in the cup and his fur absorbs a little coffee and then he withdraws his paw and licks the coffee off. If left to his own devices, he'll take quite a few drinks of coffee. For many years I thought Binky liked the coffee because I use cream, but I later found out, Binky likes Coffee !
A couple of years ago my sister-in-law, Gail, came to visit us from Australia and we were all sitting around visiting in the morning. Gail saw Binky "drinking" coffee from my cup and was truly amazed. She and I agreed Binky probably wouldn't drink her coffee since she doesn't use cream. After a while, we all went outside for a tour of the garden since it was such a nice day. When we returned to the house we discovered Binky "drinking" from Gail's coffee cup. That's when I learned the real truth, Binky Likes Coffee !
Friday, January 23, 2009
Weaving Clay, Missing Classmates
Last year one of the things I enjoyed was weaving clay. I thought I would continue weaving clay to make some different pieces this year. The trivet above was made from stoneware clay, brushed with two alternating glazes in a basket weave fashion and fired to Cone 10 reduction. The trivet was placed on the bottom shelf of the updraft kiln. The bottom shelf is always much hotter and probably reached Cone 11 or more. The vibrant color of the glazes I chose was mostly burnt away, but I like the subtle color which was left behind, just enough to see the contrast I was hoping for.
The last few days I've been using porcelain and weaving clay again. The tray above is 10 inches long and 8 inches wide. The porcelain trivet below I made with narrow strips of clay and some rolled feet to elevate it. I had a request from someone for another one of my woven cross. So I have made two porcelain crosses below, which are made from some very thin pieces of clay, I hope they hold up. I want to make a couple more porcelain crosses with thicker pieces of clay. The Rustic Cross photo at the end is one of the first woven crosses I made from stoneware clay. This cross was about 20 inches tall and 12 inches wide. I also made another woven cross with a beautiful blue and tan glaze, but unfortunately I neglected to take a photo before I sold it. So I'm trying to remind myself to take photos of every piece I make when it is green and after it comes out of the kiln, in case I want to refer to it again.
You're probably wondering if I'll ever get to the barrel firing. I'm wondering that too, but believe me when I say I am just as anxious as you to try my hand at this firing, which will be a totally new experience for me. The only holdup is having enough dry pieces to do a bisque load for the barrel firing. Everything is taking, what seems like, forever to dry in my little shop which I only heat if it is extremely cold.
In the meantime, I've gathered more supplies in preparation for the barrel firing. Gary cut some kindling from a dead popular tree and we bought a 1/4 cord of some very dry eucalyptus to supplement our avocado wood. I purchased some copper carbonate, copper oxide, and red iron oxide. I have a whole plate full of dry banana peels. Tomorrow morning Gary and I are going to the local cabinet shop to pick up two 55 gallon drums of hardwood sawdust they saved for me. That should be enough sawdust to last me for a while. When we're in town we'll also pick up a bale of straw. Now if my clay pieces would only cooperate, I could do a bisque and then I'd be ready to fire away. Hurry up clay.
My local community college cancelled the beginning and intermediate ceramics classes and the ceramics studio class for this semester. I don't know if these class cuts have anything to do with the budget shortfall in California, but I suspect they do. I've been feeling really bad this week because many of my classmates are unable to get into any art classes at all this semester. As luck would have it, I enrolled in Mixed Media Sculpture at the end of last semester, so I will be attending class this semester. The only courses offered in the evening are the class I am taking and a Jewelry class, and both classes are full with waiting lists. The ceramics classes offered at the college in the next town are also full with a waiting list. I know I am going to be missing my classmates this semester quite a bit. I've invited my classmates to my house for what I hope to be several barrel firings so we can all stay in touch.
Monday, January 19, 2009
How Do You ?
I am curious, how do you sign your pottery? Above is a ceramic disc with my initials impressed with a stamp and my signature. See how clear the stamp is compared to my signature. But the stamp is, well, so plain looking and not very artistic. I scribed my signature with the back of a needle too, but it doesn't show up very well. For some pieces, I'll continue to use my signature, but sometimes the piece is so small I can't fit my signature on it. Stamps are quick and easy to use, they make a clean impression in the clay, and are much more visible and clean looking on the ceramic piece than my hand drawn signature tends to be.
Do you use a mark on your pottery? The stamp shown above with my initials is an inexpensive rubber stamp I had made and I use it without ink. I'd like to settle on a bit more stylized mark and either carve it in clay or have one made up, perhaps with a square border or circle around it. I'd like to stick with one type of mark or signature for all the ceramic pieces I make. Do you stamp some of your pottery pieces and sign other pieces?
We're all pretty familiar with famous ceramic marks or artist signatures, such as those of Newcomb pottery above. Signatures or marks are a way of identifying the maker of the pottery when the ceramic pieces has left the artist's hands or studio. Here's a signature of Louis Comfort Tiffany.
I thought deciding on a mark for my pottery was going to be so simple and the more I try to make something up, the more ideas I come up with. I need help narrowing down the choices. So I thought I would see how you sign your pieces, thinking this might help me make a decision. Looks like the star symbol was used with Meissen pottery throughout history.
Look at these Japanese marks, they are art in themselves.
Below are some ideas I've come up with, please let me know what you think. Since my name is Linda Starr, I thought I would use the L and the S or a star symbol. Do you think using the star symbol is too hokey? Please keep in mind I quickly made the examples below out of block letters, but they can be changed into more stylistic or script style letters or hand drawings. For now I've left off a border around the examples.
Example 10 is left blank on purpose, because that's going to be what I decide - that is - if I can ever decide. Perhaps if I learn how you sign your pottery, I'll be able to make a decision.
Do you hand sign each piece of your pottery? Do you vary the way you sign your pieces? Do you change from year to year? Do you put a date on your pieces? I'd love to hear your thoughts. How do you sign or mark your pottery? As always, thank you for your comments.
Thursday, January 15, 2009
The Secret Ingredient!
These red hot chili peppers are the secret ingredient! Now that you know the secret ingredient! here's, as Paul Harvey says, the rest of the story:
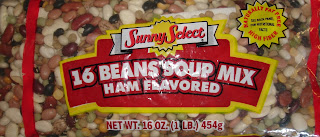
Everyone who tastes my Spicy Beans and Rice likes it and says, "Gee this is really great chili." Here's how I make my spicy beans and rice. First I take a package of 16 bean soup mix. I discard the ham flavoring packet - it has monosodium glutamate in it and some other stuff I am not sure I want to eat. Besides I like using my own spices. I soak the beans overnight at room temperature covering them with about two inches of water. If you have a stove with a pilot light, don't leave the soaking beans on the stove overnight, since the heat from the pilot light will start to cook the beans and possibly make them start to ferment.
If you can't find the 16 bean mix you could substitute some beans of your choice. The mix contains small white beans, small red beans, black beans, light red kidney beans, large Lima beans, red lentils, pearl barley, Adzuki beans, green split peas, yellow split peas, pinto beans, baby Lima beans, Great Northern beans, lentils, pink beans, and blackeye peas.
The next morning I put the beans in my large, electric crock pot. I add one large can of chopped tomatoes and one small can of tomato paste. (Notice how I'm using generic brands so I'm savin pennies, makin dollars). I add about 10 cups of water. I turn the crock pot on to cook for 12 hours. Next I add about a teaspoon each of dried spices like celery seed, rosemary, cilantro, tarragon, mustard seed, one crumpled-up bay leaf, and some salt and pepper.
Sometimes I chop up a shallot and add that in. I might add in some sage or thyme. If I have some carrots and celery I might chop them up and put them in. I make it a little different each time, but I always use the secret ingredient! You're probably wondering if it makes that much difference whether you use the secret ingredient or not. Yes it does, just three tiny red hot chili peppers give the Spicy Beans and Rice a lot of flavor and just enough warmth to make a big difference.
My home grown peppers are really hot, if you buy some at the store they might not be as hot, or they might be too hot for your taste buds. So the first time you try the recipe, use one red hot chili pepper, if it isn't hot enough, then you can always add one more and so on. Wait till the end of the cooking time until you do your taste test for spiciness, since it takes a while for the flavor of red hot chili peppers to meld into the rest of the ingredients.
I finely chop up three red hot chili peppers. I grew these peppers in my garden and dried them naturally at the end of the season. Two of the peppers are Hungarian wax peppers and one is a Fresno chili. I never use three Hungarian chili peppers, they are too hot, only two. My Fresno chili isn't that hot so I add one of those in for flavor too. Every red chili pepper is different, some are hotter than others. If you don't have peppers you grew, you can use dried peppers you purchase. A word of caution: after chopping the peppers, wash your hands well before touching anything, like your eyes. Also wipe down where you chopped the peppers too.
During the last hour of cooking, I stir in one cup of brown rice and let it cook. This cup of rice is a mixture of several types of brown rice. You can use white rice if you want, but don't use the quick-cooking type of rice. Beans and rice make a complete protein which is good for human dietary needs, so be sure to use the rice. If the mixtures is too thick at the end, just add a little more water. Hint: if the mixture is too hot for your taste buds, adding a little water to thin it down also cuts the hotness down. These Spicy Beans and Rice will really warm your innards on a cold day. Give them a try and be sure to use the secret ingredient!
Tuesday, January 13, 2009
Missing Previous Gardens
I was reading the Ceramic Arts Daily today and decided to look at Robin Hopper and Judi Dyelle's website Chosin Pottery, Inc. They have some wonderful pottery in their galleries, but be sure to check out their online garden tour and the plants section on their website. As I took their garden tour I found myself missing my previous gardens. The photo above was taken in my current garden in summer and shows my lavender gift shop which I have converted into my clay studio.
For now (our home and gardens are for sale, please contact me for more information if you are interested in moving to this paradise), I live in an arid climate. I have established some beautiful gardens with the help of low cost, gravity-fed irrigation here at Springville Lavender Gardens, where I grow lavender, other perennials, fruits and vegetables. But I used to live in the Sierra Nevada mountains for ten years, near Mt. Lassen for two years, and near Twain Harte for two years. My gardens in the last three locations were very different than my gardens here. In my three previous gardens the locations were heavily forested and I grew many of the plants you'll see shown on the website of Robin and Judi. This photo is from my upper lavender field with some Tropicana lily in the foreground.
Gardening in the forest or the mountains is much different than gardening in a valley or in an arid climate. A forest or mountain garden changes with the season dramatically and the plants that thrive there are much different. The foliage on plants in the forest is a brighter green while the foliage in an arid garden is a more gray green or olive color. The sun is more intense in an arid garden and I can feel the heat all around me here even in winter. In a mountain garden the sun is dappled and I recall feeling the coolness exuding from the plants especially in the morning and evening. The photo above is some rosemary and french lavender growing near the herb garden pergola near our house.
If you make a comparison to my gardens shown here to the ones of Robin and Judi's, perhaps you'll see why I was missing my previous gardens today. Unfortunately when I lived at my mountain gardens, I didn't have a digital camera, so I don't have any photos to post of those gardens. One of these days I'll have to scan photos of my mountain gardens so you can see what they looked like. The photo above is my Cecile Brunner rose arbor which needs pruning as we speak. I better take advantage of the good weather and get busy.
Friday, January 9, 2009
Savin Pennies, Makin Dollars
Guess what? I made a list of expenses and income and the expenses are almost equal to the income. If there is an emergency or extra expense, what will I do? So I'm looking for ways I can be savin pennies, makin dollars. No I don't mean printing them, I mean earning them. Here are a few of the things I am doing or planning on doing. Are you doing anything to reduce expenses or increase income?
Raised my insurance deductibles for our cars and home. I am evaluating each bill we pay to see if I can reduce the bill, like the satellite TV - I don't even watch TV and I'm paying for two - maybe I can get netflix instead.
Buying used items by shopping at garage sales, thrift stores, eBay, Craig's list or half.com. Things like t-shirts (Gary works in construction and goes through them like nothing - some of them are brand new at the thrift store), paperback books, towels for the studio, slump and hump molds, texture tools for clay at the thrift stores, old sheets for the slab roller.
Looking around for things I no longer use so I can try to sell them by posting an ad on local bulletin boards or selling the item on Craig's list.
Buying store brands and looking at the cost of each item posted in the grocery store to see which size is less expensive (sometimes it isn't the large size). I am buying items on sale and looking for sales.
Inviting folks over for lunch or dinner instead of going out to lunch or dinner. We often take our lunch and have a picnic in nice weather instead of going out to lunch or dinner. I keep some nuts and water in the car in case we get hungry so we can snack on those instead of being tempted eat at a restaurant.
Just before Christmas, we rolled up all the coins we were saving and got over $200 which we used for our vacation.
Staying home more instead of going away for the weekend. When we went on a recent vacation we camped and took our own food to save money.
Doing all our errands in one trip when we can and trying to shop only once a week to conserve on fuel.
Don't go to the dry cleaners and wash my clothes in cold water and wash and dry only full loads. I got some of Trader's Joe's laundry detergent and it has lasted so long I can't believe it.
Making more soups and rice and beans. We're eating oatmeal instead of boxed cereals for breakfast. I have a vegetable garden and raise my own fruit. I am thinking of getting some chickens for eggs. I buy food from local farmer's whenever I can.
Lowering thermostat in winter and raising it in summer.
Saving my receipts and boxes in case I have to return something or in case I find it cheaper somewhere else I can return the more expensive one (hey that happened, I found a sketchbook cheaper and returned the more expensive one to the same store).
Earnestly looking for a job, even a part time job. Know of any legitimate work from home jobs? Heck, if you have a job I can do, let me know - I'm very dependable (and creative too).
Opening up my studio for pottery sales more often.
Thinking of having a farm stay at my home, like a bed and breakfast with maybe a clay or gardening class.
What do you think? Have any other ideas on how I can be savin pennies, makin dollars, please let me know, big or small, every penny and dollar counts. Thanks for reading and posting.
Wednesday, January 7, 2009
Faux Bois
For some reason I am drawn to trees lately. Perhaps because it's winter and all the leaves have fallen and the structure of the trees is more visible this time of year. I thought about making some faux bois, or false wood, sculptures of various parts of trees. I'm using B-Mix Cone 10 porcelain clay.
While I was at the coast recently I took a walk through a eucalyptus forest near San Simeon. The smell of the eucalyptus leaves was so pungent. As I was walking along I saw the bark peels off the trees in big strips and as it dries it curls up on the edges. I was inspired to create a sculpture of a piece of bark which might have fallen from one of the trees. This sculpture is about 14 inches long and 7 inches wide. I intended this sculpture to be a bit longer and not as wide, but I like the way it turned out.
Near the campground where we stayed there had been a fire and several pine trees were scorched and had fallen. There was still some debris left from the fire and I noticed a rotting branch on the ground. I am not sure about the branch coming out of the log, it's too late to adjust it now because it is too dry. This sculpture is about 12 inches long and 1.5 inches wide. I might make a few more of these rotting log sculptures.
To me trees symbolize beauty, strength and endurance but sometimes trees succumb to the elements for various reasons. There are several trees down by the river which have died, but they remain standing. In the evening I see a Great Horned Owl sitting in one of the trees.
I'm not sure I like this tree sculpture, it was supposed to be more realistic looking, instead it came out more symbolic or stylized. I think I need to make the transition between the branches and trunk more gradual. This sculpture is about 11 inches tall, with a 2 inch trunk and about 6 inches wide for the branches. I might add an owl to the tree; not sure it will help. I guess I'll try making another one of these. I've got it propped up with a ton of chopsticks till it dries, we'll see if it makes it overnight without slumping down.
Sorry about photos not being better, I'm tired and I don't feel like going back out to the studio to take some more, it's too foggy and cold, so these will have to do. That misty mountain photo is about as clear as it's been here for over a week. I guess I'll be spending some more time in the studio instead of outside again tomorrow. I've really got to prune the grapes, fruit trees and roses, maybe we'll get some warmer weather soon. Good night.
Tuesday, January 6, 2009
All Odds Against Me
Turned on Sirius music tonight just in time to hear John Lee Hooker, Jr, singing That Be The Blues from his All Odds Against Me Grammy nominated CD. Wooooooooeeee! Blues is truly progressive and enduring - from what I heard in clubs years ago in the San Francisco bay area - up to now. All I can say is check out Hooker's website and have a look see; I'm going out pronto to get the CD. Photo courtesy of Colin Dilnot, In Dangerous Rhythm.
Monday, January 5, 2009
Barrel Firing Prep
The only time I can do a barrel firing safely here is in winter. The rest of the year the fire danger is too high. So I am preparing to do one within the next month. Here's the list of supplies I need for my barrel firing.
Barrel(s)
Dry Wood
Kindling
Straw
Newspaper
Wood Shavings and/or Sawdust
Seaweed
Rock Salt
Baking Soda
Copper Carbonate
Red Iron Oxide
Miracle Grow fertilizer
Dried Fruit peels
Copper Wire
Sisal Twine
Chore Boy Scrubbers
Extra Heavy Duty Aluminum Foil
Sponge
Soft Cloth
Nylon Brush
Paste Wax
Rubber Gloves
Dry Wood
Kindling
Straw
Newspaper
Wood Shavings and/or Sawdust
Seaweed
Rock Salt
Baking Soda
Copper Carbonate
Red Iron Oxide
Miracle Grow fertilizer
Dried Fruit peels
Copper Wire
Sisal Twine
Chore Boy Scrubbers
Extra Heavy Duty Aluminum Foil
Sponge
Soft Cloth
Nylon Brush
Paste Wax
Rubber Gloves
While I was at the coast last week, there was a storm the first day. The next morning I noticed a bunch of seaweed (kelp) had washed ashore so I gathered some. I also found some dry avocado wood which is a soft wood but the price was right. I am still looking for some dry hardwood which doesn't cost an arm and a leg. I'll be calling local cabinet shops in hopes of picking up some wood shavings and sawdust. Maybe they'll have some scrap wood. I'll get some straw from my local feed store. I suppose a farmer or two will contribute some dry manure.
I have James Watkins and Paul Wandless book on Alternative Kilns & Firing Techniques, but I found a couple of articles on the internet too. Ceramic Arts Daily has a great article Successful Barrel Firing by Paul Wandless. Follow the links on this page for some more information from James Watkins ceramics class.
Meanwhile I'm making various pots, then I'll bisque them in preparation for my barrel firing. I've also invited several potter friends to join in on the fun. Stay tuned for more as the month goes by.
Sunday, January 4, 2009
Pinch Pot Warm Up
It's been almost three weeks since my hands touched clay, so I thought I'd warm up today with some pinch pots. First I turned on the electric space heater in my studio and did a bit of organizing, storing supplies, and generally psyching myself up to get back into the clay groove. Normally my studio stays warm due to passive solar, but the sun never showed it's face today. It was misty, overcast and darn cold; in the lower 40's all day long. I know that may seem warm to some folks, but for here it's cold.
I thought I would make a few pots for a barrel firing I plan on having soon. But, as sometimes happens, this pot took it's own course. I used Laguna B-Mix Cone 10 clay. The pot is 3 inches tall, 5 inches wide at the top, and 1.25 inches at the base. What do you think, can a thin-walled porcelain pot make it through the rigors of a barrel firing? Does anyone know the best shaped pot to make for barrel firings?
Tomorrow I'll smooth out the surfaces on this pot and warm up a bit more. I also plan on gathering more supplies for my upcoming barrel firings, more about those plans later this week.
Friday, January 2, 2009
Art & Fear|Girl In Hyacinth Blue
We were walking along Main Street in Cambria and came upon a thrift store called Love Me Two Times. What a great name for a second hand store and what a great band The Doors were.
There is a little bit of everything in the store including a great selection of books. I found a couple of books I'd like to recommend. Most books I read I donate back to thrift stores, but I found two I'll be re-reading and also keeping for my library.
Art & Fear, Observations on the Perils (and Rewards) of Artmaking is written by David Bayles and Ted Orland. Each chapter is filled with any number of ideas, we as artists may have thought, and it helps to see these thoughts in print. Several folks in classroom settings have said I produce too much work. I was happy to see a chapter in the book suggesting lots of work is what should be done.
Girl in Hyacinth Blue written by Susan Vreeland is an historical fiction about the travels of a Vermeer painting over time. But it is written in reverse chronological order which gives an interesting twist to the story. This book is beautifully written and thought provoking. While reading, I found myself thinking about the purpose of art in my life and other's lives as well.
I highly recommend both of these books which can be enjoyed by not only those involved in the profession of art but by anyone else.
Thursday, January 1, 2009
The Ocean & The Birds
just returned from the coast
Long Billed Dowitcher
tidal pools near Cambria
Scrub Jay
sea anemone in tidal pool
beach near Cambria
Western Bluebird
moon rocks
these birds remind me of Alfred Hitchcock's, The Birds
Stellar Jay
The cats are so happy to see us, I've got to go play with them. Stay tuned for more about our trip tomorrow.
Subscribe to:
Posts (Atom)