Friday, February 27, 2009

Circles and Balance


A circle seems a simple form. And yet, this simple form is complicated. I made a single circle and wanted to combine it with another circle. I wanted both circles to stand on their own, yet somehow be one. I needed to balance the circles with one another.


Once I was able to balance one circle within the other and they could stand on their own, I went on to make more circles. I made two circles and then balanced another circle within the two. All three are able to stand on their own and yet they are balanced within the group.


Now I'm exploring other shapes and sizes: squares, rectangles, triangles and other geometric shapes. My intention is to make balanced geometric forms in various shapes and sizes. These clay circles are fun to try and balance, like an adult puzzle. There's only one way they'll stand upright on their own, so some effort has to be made to balance them. I guess circles are like relationships and other things in life. I never knew geometry could be so much fun and had so much meaning.

I noticed this baby lizard outside the studio this afternoon. He's about two inches long. This morning it was fairly warm, but in the afternoon it turned cool. This lizard looked so cold on the concrete I picked him up and put him on the South side of the Studio on a plant. I hope I helped the balance of nature.

Wednesday, February 25, 2009

First Barrel Firing

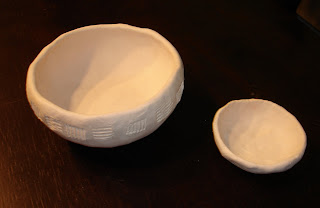
Pinch Bowl One
Interior View


Pinched Bowl One
Front View
2.5 h x 5 w


Pinch Bowl One
Back View


Pinch Bowl Two
3 h x 4 w

Two Itty-Bitty Pinch Bowls
1 h x 2.5 w


Dusty Miller Pendant
3 x 2


Two more Dusty Miller Pendants


Sage Leaf Pendants
ranging from 4 in long down to 2.25 in


I cleaned the pieces but didn't put any wax on them because I was going to re fire a couple, but I've decided to leave them as they are. What do you think? I know if I had more bisque ready, I would be doing a another barrel firing again today. What great fun and every piece is such a surprise.

If you missed it, check my holy smoke post on how to do your own barrel firing. Also check Amy, Becky, and Elaine's posts on barrel firings. So far they have had eight firings. If you have any questions, please don't hesitate to ask me. I've learned so much from reading other blogs, I'd like to share what I've learned too.

I'm going to try making some more pots with taller, flatter and/or smoother sides to show off the colors obtained in barrel firings. I think my derriere pot would be a good one for a barrel firing. I'm off to the studio to make more pots.

Tuesday, February 24, 2009

Holy Smoke


It's bright and sunny and a perfect day for my barrel firing. I already bisqued two pinch pots, two itty-bitty pinch bowls, five sage leaf pendants, and three dusty miller pendants. I prepared each piece of bisque in a different manner. I put some of them in aluminum foil saggars with copper carbonate, copper oxide, red iron oxide, orchid fertilizer (the label said it had a lot of minerals in it), banana peels, chore boys and some miscellaneous ingredients.

Here's how I prepared the barrel. After I obtained a metal 55 gallon drum, I had it steam cleaned. It had contained solvent, so I didn't want to have an explosion or anything. I had the top of the barrel cut out. Just above the bottom of the barrel, I cut two slits about 6 inches in length on opposite sides of the barrel. About one foot up from the bottom of the barrel I had four, four inch squares cut into the metal equal distance apart. The squares were only cut on three sides leaving the bottom of the square attached to the barrel. Then we pushed these squares into the interior of the barrel. These squares allow a metal BBQ grate to stay elevated in the barrel without falling to the bottom. It also allows air to enter the barrel from the sides and keeps the fire burning nice and hot. About a foot up from the squares we drilled holes around the barrel about every six inches or so to let more air in the barrel while it is burning.

Here's how I loaded the barrel. I put a nice bed of straw in the bottom of the barrel and packed it in pretty tight with a shovel. Then I put some kindling and some hickory chips on top of the straw. Next I put in a metal BBQ grate and pushed it down to the metal supports. Next I placed each of my bisque ware pieces on the grate. Then I put some seaweed around the pieces. Next I packed straw around the bisque pieces, then more hickory chips, more kindling, and sprinkled some more of the chemicals. Then I put some split pieces of avocado wood and then I put eucalyptus wood on the very top. This filled the barrel to the top with the top layer of wood extending just over the top of the barrel. I soaked the wood with BBQ lighter fluid. While the fluid was soaking into the wood, I went up to the house to look for a match. It took me forever and then I finally found one of those liquid fire starters and went back and lit the barrel on fire.

There was a little bit of a false start. I lit the barrel and it didn't seem to catch on fire, just a few puffs of smoke. After about five minutes, I was getting rather impatient so I crumpled up some paper bags and pushed a few of them in, put a few more sticks of avocado wood on top and re soaked the wood with more lighter fluid. Then I re-lit the top. Next thing you know the wood catches on fire and starts burning real well. I'm thinking this is a piece of cake. So I pulled up a lawn chair to watch and wait.

After about ten minutes or so the barrel starts to smoke. I think, oh well, that's not so bad, a little smoke is to be expected. Then it starts to smoke a whole bunch. Then it's like a huge smoke screen all around the barn, then way high up in the sky. Since I'm here by myself I'm thinking Holy Smoke - no pun intended - but wow, what in the heck am I going to say if anyone shows up. I kept looking around to see if anyone in the neighborhood was noticing this huge cloud of gray smoke billowing up into the air hundreds of feet high. I was also hoping the fire department didn't show up. I started looking around to see what my surroundings looked like. I decided to bring my bags of chemicals in the house in case anyone showed up. Besides the smoke was so heavy I decided I didn't want to breathe it. The heavy smoking went on for about ten minutes or so, but it seemed like an eternity. The whole time I'm still thinking, holy smoke, holy smoke. Not sure where the expression, holy smoke, comes from but it sure fit this situation.


Finally the barrel starts to burn real hot with red flames everywhere, thank goodness. The fire stayed flaming for over 45 minutes. I could still see red embers inside the barrel about two hours later. Still a little hot but not glowing three hours later. I took this last shot about four and a half hours later. Everything is all burnt and I can see the outline of the two pinch pots and the itty-bitty bowls, but I can't see any of the pendants. The barrel is barely warm to the touch. So I go in the house to get my pot holders so I can lift the rack out of the barrel.


As I was walking up to the house I saw two monarch butterflies just opening their wings for the first time. Hope that means everything in the barrel does well. Oh, that's the rose for today, number thirty. The story of holy smoke to be continued tomorrow; I've got to run to class.

Monday, February 23, 2009

Derriere Pot


I did a little organizing, cleaning, and pinching today. I'm using B Mix porcelain, Cone 10. It's nice to work with and doesn't dry out quickly. The pot above became what it wanted, derriere pot. Here are a few others.


The cats kept me company while I typed this post. Left to right, Butter, Binky, and Betty. When I went down to the studio to get some photos, Betty ran outside. I could hear the Great Horned Owl hooting. I hope Betty doesn't become a meal for him.


I'm off to try and entice Betty back into the house. Meow, meow, tidbits, tidbits, here Betty, Betty! I tricked Betty. I went down to the studio and left the door open a little bit. Thank goodness cats are curious. I called Betty and when she came in the studio to see what I was doing, I grabbed her.


Here's rose number thirty-one, a nice yellow. I know it's not Midas Touch because I have that one somewhere else and Midas is a much brighter yellow.

Sunday, February 22, 2009

Sorry, No Barrel Firing


Things just don't seem to be going my way. Yesterday was cool and dry with high clouds. Early in the morning I called the Air Pollution Control District phone number and the recording said "Today has been declared a no burn day below 3,000 foot elevation". Today it is raining steady, the Air Pollution Control District recording said, "Today has been declared a no burn day below 3,000 foot elevation".


Now Gary's telling me I only have a paltry amount of pieces to fire and is wondering if it's really worth firing a whole barrel for just these few pieces. Maybe he's right. I am so disappointed. For the first bisque firing at school I only had a few items ready and eight of those were my leaf panels which aren't suitable for a barrel firing. Most of the other items I completed I'm firing in the gas kiln because I'm also doing a glaze experiment. For the glaze experiments, I need a separate pinch bowl for each one. So that uses up the rest of my bisque pieces.


Since I only have a few pieces, I thought I could place each one in it's own aluminum foil type saggar with different ingredients in each foil saggar to see what the results are. I only have two pinch bowls, two mini-mini bowls (1.5 inch diameter), five sage leaf pendants, and three dusty miller leaf pendants. Is that enough to do a barrel firing? Should I do a barrel firing in the rain?

It seems I am trying to accomplish too many experiments at once. But how can I learn if I don't try them all - and as soon as I can. What do you think? Should I wait till I have more pinch bowls to fire in the barrel or should I just go ahead with a small firing?


Today, I even tried to talk Gary into firing the barrel near the edge of the barn but he wouldn't go for it. So tomorrow we (I) will (should) definitely be having a "BBQ" in our blue barrel. I realized we have some food which might spoil if I don't use it immediately - Right? Right! I know "BBQ's" are allowed. More later, or hopefully, more sooner than later.

Here's rose number thirty-two. Do you know the name of this rose?

Wednesday, February 18, 2009

Fern Fossils

fern-leaf-panel-with-fern-applied-as-resist
Fern Leaf Panel
fern applied as resist to green ware
later sky blue slip applied, then bisque fired

I just retrieved my leaf panels out of the bisque load yesterday. I use leaves as a resist on the panels and then I paint slip over the whole panel including the leaves. I usually peel the leaves off before firing. This time I was in a rush and just left the slip coated leaves on the panels, thinking the leaves would just burn out. The popular leaves on two leaf panels burned out, leaving a powdery residue I easily brushed away. The fern leaf panel still had slip adhering where the fern leaves were, so I had to scrape away the residue of the fern coated slip.

fern-leaf-panel-after-bisque-firing
Fern Leaf Panel
sky blue colored slip applied over fern
after bisque firing, slip scraped from fern sections

As I scraped away, I wondered why the fern coated slip didn't turn to ash like the other leaves. I thought maybe the fern leaves burned at a higher temperature than the other leaves, but this didn't make any sense. Even though the kiln probably only got to Cone 07 (that's another story), I knew 1785 F or so was hot enough to burn up the fern. As I scraped away the slip where the fern impression was, I saw the fern leaf itself was actually gone, but the slip seemed to have chemically reacted with the fern leaf, changing the chemical composition of the slip. If I wiped the panel with a wet sponge, the slip coated fern portion turned a darker color. The slip on the other parts of the panel remained dry and were bonded to the clay.

fern-platter-fern-slip-resist
Fern Platter
fern used as resist,
white slip applied to red clay,
fern removed, ready for bisque firing

I started thinking about fern fossils and how they are formed. I discovered ferns are some of the most common fossils found on earth. Most fern fossils are found near coal mines. The leaf tissue rapidly decomposes and is preserved by chemical reactions of calcite and iron carbonate. I'd like to experiment further with ferns. Next time I'll let the fern remain on the clay through the glaze firing and see if I can produce some man made fern fossils. I'd also like to see some actual fern fossils and try to replicate the look of them on clay. Every process in clay seems to lead me to another process and more experimentation. This week I'm glazing my leaf panels; they should be ready to show you in a couple of weeks. I can't wait to see how they turn out.

For some reason I am drawn to ferns. Ferns appear delicate yet are quite hardy, growing in places where other plants cannot or will not. In West African wisdom ferns are a symbol of endurance, defiance against difficulties, hardiness, perseverance, independence and resourcefulness. This explains a lot about why I am drawn to ferns.

rose-number-33
Rose Number 33, along fence line
if you know this rose, please let me know
if not, just guess or make a comment anyway

There were about 40 different rose bushes planted along the fence line, when I moved here. I have no idea what varieties they are. Since I have so many roses I thought I would post a rose every time I post on my blog. If you know the name of the rose, please let me know.

Monday, February 16, 2009

Mr. Lincoln, Martha Washington

Mr.-Lincoln-rose
In honor of two of our great president's I'm posting about a couple of plants from my garden, Mr. Lincoln rose and Martha Washington geranium.

Mr.-Lincoln-rose-bush
Above is a photo of my Mr. Lincoln rose, which isn't the greatest photo, but was the only one I could find in my photo archives right now. Of course, Mr. Lincoln isn't blooming right now, but this summer my Mr. Lincoln will be almost 6 feet tall and covered with very, long stem, fragrant, red roses. The foliage is dark green and glossy and is very resistant to any kind of disease. This rose is probably one of the best known roses grown today.

Martha-Washington-geranium
I wonder if my Martha Washington geranium knows we're celebrating presidents day? This geranium is trying to bloom right now and normally this plant needs hot weather to bloom. In the summer this plant is covered with blossoms and is much hardier than I suspected. It survived the heavy frost of two winters ago when it reached 15 F three nights in a row. After such a heavy frost, I didn't think this plant would recover, but in June it started pushing up new leaves from the soil. I use a heavy duty, ground cover cloth and shredded bark for mulch and I think that helped. If your plants freeze, don't be too hasty to take them out of the ground, the roots may still be alive.

Plants are so resilient, they remind me that with hope, time, and the proper care people and countries can do the same. Happy President's Day.

Friday, February 13, 2009

Green Tea


Green Tea by Rollie Younger

While on vacation in Cambria during the holidays I had the distinct pleasure of wandering upon the studio of master potter, Rollie Younger. The photo above is of Rollie's boiler teapot, Green Tea. I'd love to be sipping a cup of green tea right now and gazing at Rollie's beautiful tea pot. Rollie is known for his wonderfully detailed boiler teapots in addition to his other beautiful pottery.


Power Up Tea by Rollie Younger

The teapot above is Power Up Tea which took honorable mention in a Korean exhibit. Rollie and his wife recently finished remodeling his studio and their home addition, after an earthquake did some damage a few years ago. Along with his walkout basement studio, Rollie has a separate building as a small display area for his ceramics.

Rollie mentioned he used to have a cabin in Camp Nelson, which is about 15 miles up in the mountains above my home. We immediately had something in common. We talked about local points of interest and about the oranges he used purchase at a local ranch. Rollie said he used to go trout fishing in the stream near his cabin. I invited Rollie and his family to come for a visit when trout season opens up.


Turbo Tea by Rollie Younger

Turbo Tea above is one of the first boiler teapots Rollie made. Part of my conversation with Rollie drifted toward barrel firing. Rollie had some beautiful platters in his studio he had fired in barrels. I found out Rollie used to teach ceramics in Los Angeles and not long ago he returned to taking classes at Cuesta Collge where he initially developed his idea for making boiler teapots. Rollie said he enjoyed working in a college atmosphere again as a student instead of a teacher. We talked about the important artistic roll community colleges have for adults wishing to return to college.

The San Luis Obispo Tribune article gives more information about Rollie and his career in ceramics. Rollie's "Tea Time for Post-Industrialists" show is on display at the San Luis Obispo Art Center through this month where nine of his boiler teapots are on display.

Thursday, February 12, 2009

Furled Bark Sculptures

Furled-Bark-Sclupture-One
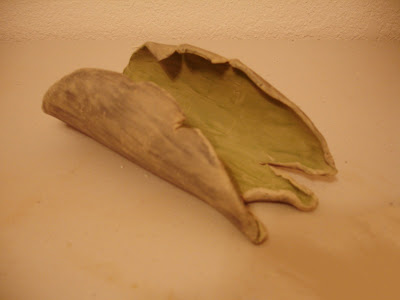
Perhaps you remember my previous post about faux bois, false wood. I've been working on some more sculptures with a woodland theme. I am also continuing my experimentation with mason stains. This time I'm using them full strength rather than mixing them with slip. I am, however, diluting the stains with water so I can paint, rub, and incorporate them into the clay.

Furled-Bark-Sculpture-Two
I've made three Furled Bark Sculptures which were inspired by eucalyptus bark litter I observed walking through a grove at the ocean around the holidays. I've mixed the mason stain with water and I am hoping to fire these without any glaze and let the stain be the only colorant. I think I diluted the stain a little too much on the last one. I am finding I need a scrap piece of clay nearby to test the intensity of the mason stain, before I put it directly on the sculpture.

I like the color on the first one best, especially the dark outer bark which contrasts nicely with the inside. I think I will add more color to the outside of the other two tomorrow. Hopefully I will be able to add it without ruining them. I really find I can 'see' the work much better if I photograph it and look at it later. I just noticed these three sculptures look very similar, I want to work on making future ones more random, which was my original intent.

Furled-Bark-Sculpture-Three
Tomorrow I plan on making a few tiles to do some more experimenting with various methods of staining the clay to compile results for future use. My previous sculptures are quite dry now and I am hoping to bisque them within the week to see the results. Then in a week or so I will bisque these bark sculptures along with the test tiles I'll be making. I know I'm probably doing this backwards, but sometimes I just can't wait to try something. So I am considering these Furled Bark Sculptures rather large test tiles.

Wednesday, February 11, 2009

Help Save My Monarch !

Linda-Starr's Monarch-butterfly
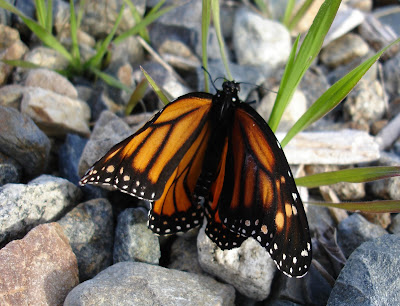
Please help save my monarch butterfly! I was cooking dinner and looked out the kitchen window and saw something moving in the gravel near the herb garden. I thought it was a little bird eating seeds, but it didn't fly away. Then all of a sudden I thought, Oh no, I hope it isn't a butterfly that has opened up at this time of year. I ran outside and sure enough it was a monarch butterfly struggling to warm inself in the cold air. We are expecting almost freezing temperatures tonight of 34 F and today it only got up to 50 F. Most butterflies need at least 70 F or so to even warm their wings up enough to fly.

monarch-butterfly-in-a-box-in-my-house
I ran into the house to get my camera and try to think what I could do. I decided to get a box and put some of my rosemary that is blooming inside the box. I got a small stick to put up next to the butterflies legs to get him to climb onto the stick so I wouldn't touch his wings. Once the butterfly grabbed onto the stick I put him in the box and brought the monarch butterfly into the house to warm up. But now what do I do? I am going to quickly research on the interet, but I thought someone out there might know what do do.

monarch-butterfly-just-emerged-from-his-chrysalis
Maybe you're thinking I should just let nature take it's course, perhaps. But once I saw the butterfly trying to live, I just couldn't leave him out there in the cold weather to struggle needlessly. Please help save my monarch butterfly, by letting me know what to do or who to contact to advise me what do. Thanks.

Update: I read I can keep him in the house for a couple of days, but then I have to release him. Luckily I have some nectar plants blooming and I will bring him some of them. Perhaps tomorrow I will release him onto the Cape Honeysuckle, Tecomaria capensis, which still has a few blossoms since it is growing under the eaves of the front of the house.

Tuesday, February 10, 2009

Slip Decorating Butterflies

practice-slip-butterfly
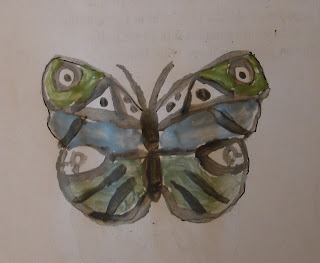
Last night I thought about embellishing the butterflies on the wall pocket I slipped yesterday. So I started out practicing with an outline of a butterfly drawn on a scrap of paper. I practiced with the three different colors of slip I made: ivy green, sky blue and best black. I made the colored slip by mixing mason stains into slip which was made from the same clay body I have used for the pieces I created.

butterfly-stickers
For the outline of the butterfly on the wall pocket, I used stickers I purchased from the dollar store. I got the idea of using stickers from Lori's blog, Fine Mess Pottery. I place the stickers where I want the clay color to remain, then I paint the colored slip over the whole piece. When the slip dries, I peel off the sticker and put it back on the paper it came on. I found out I can wipe the slip off the sticker and re-use the sticker. Talk about recycling.

wall-pocket-slip-decorated-butterflies
As I was embellishing the butterflies, I was wishing I had more colors to play with, maybe yellow or orange, but I want to see how these colors turn out before investing in any more colors. Very little slip is needed to paint the lines and circles on the butterflies which means the slip will last a very long time. I think my painting on paper is better than it is on the clay, but I like the butterflies on the wall pocket better than just the plain white color of the clay showing through.

What do you think about my just putting clear glaze on the inside of the pocket and leaving the outside slipped but not glazed? That way water could be put inside but the outside would remain the muted color it is now? Of course, I don't really know what the Cone 10 temperature will do to the color, it may be a lot darker when it gets fired or it may burn out or flake off. Hope not though.

overflowing-work-table
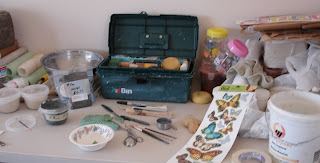
While I was working in my studio, I created quite a mess with paint brushes, tubs of slip, paper bowls with more slip in them, and on and on. I guess sometimes you have to make a mess to be creative. As I was painting away, a huge squall of rain, sleet, and hail was erupting outside.

Black-Mountain-with-snow-down-to-2000-feet
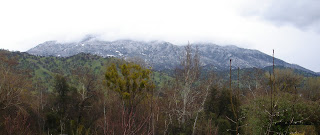
When I left the studio I saw Black Mountain has snow down to the 2,000 foot elevation. The top of Black Mountain is obscured by clouds. Black Mountain has one of the finest groves of Giant Sequoia throughout the range of Big Trees. From my house I can see the outline of the Giant Sequoia trees on the top of Black Mountain even though the mountain is about five miles away. That gives you an idea of the size of these trees. To visit the Giant Sequoias is a very humbling and awesome experience. My elevation is 1,000 feet, I wonder if we will have any snow in the morning?