Sunday, May 31, 2009

1000 F and Climbing


I finally got the pyrometer connected up, and the right sitter cones, and all my test tiles made. I doing my first firing right now - ALL BY MYSELF, YIKES.

I have a used Skutt 181 I was able to purchase well within my budget (for a song). I loaded the test tiles from three different clay bodies along with cones on each shelf. My thinking is to test the clay bodies and to see if any shelf is hotter than another. While I was loading the kiln, I was thinking, "This is really small, I need a bigger kiln". My, oh my, what's a gal to do?


I put the sitter cone in the sitter and turned the kiln on. I started at 12:30 and kept it on low with the lid propped and the top peep hole open for two hours. It already wanted to climb over 200 F. How am I going to slow candle my handbuilt pieces if it gets hot so fast on low? I kept holding a mirror in front of the peep hole but never saw any moisture on the mirror, perhaps because the lid was open? Any and all advice would be greatly appreciated.

Next I turned it to medium, still with the lid propped open till I got over 650 F and all the smell seemed to disappate. This took another hour. Then I turned it up to high for about 10 minutes and closed the lid. The operating manual says to keep the top peep open at all times so that's the way it is now.

It is now 4:25 and I am already up to 750 F. At 4:30 I am at 1000 F. Maybe this means the kiln is in real good shape because it doesn't take very long to heat up. Maybe I'll post this and you can make comments and then I'll post some more - it's kind of scary here all by myself. Feel free to chime in now.

You're all probably all laughing and saying what's the big deal? But remember I am isolated out here in the middle of the country without a soul to give me any moral support or advice - all I have is YOU - what do you think - is it all ok?

Friday, May 29, 2009

Sunset and Lightning


The sky provided a spectacular sunset this evening, afterwards we were rewarded with a three hour long electrical storm. Unfortunately the lightning is sure to have sparked lots of fires. The winds were blowing and we heard a huge tree fall down by the river.


I tried like heck to capture the lightening with my digital camera but I had no luck, just a little glow which was disappointing. At one point there were about eight or ten lightening bolts across the sky all at once. You'll just have to trust me when I say it was quite a display tonight.

In case you didn't hear, Diana Fayt announced she's on the cover of Ceramics Monthly for the summer issue, check it out. I had to bite my tongue to keep quiet till now. As soon as I get my tiles back from her workshop I'll post them. Have a good weekend.

Thursday, May 28, 2009

U Pick


The lavender is blooming! If you're in the neighborhood, stop by for U Pick of lavender, daisies and yarrow, while supplies last, mix and match too.

Tuesday, May 26, 2009

Waves


Waves by Linda Starr
8" x 4" x 2.5"

I created Waves about two months ago. It's another one of those pieces which spontaneously came to me. It's a rather versatile piece. It can be used as a paper weight, a business card holder, a note holder, or just something pleasant to look at. (Notice I left out bill holder, we don't want to talk about those). This was one of those pieces in the disaster firing, so I'm only showing you the piece as greenware. Guess I'll have to make another one.


I find myself in a state of transition right now, so I've been on a bit of a clay sabbatical. But I have been doing a lot of thinking. You might recall I decided not to go back to my previous classroom studio, but I've decided not to attend the other college either. The fuel cost and the time element are limiting factors right now, but I also find a classroom setting doesn't fit well with my style of working with clay.


This evening I was reviewing the work I did over the past fifteen weeks. I could easily count 45 different forms I made during that time. I'd say ninety-five percent of the ideas were conceived and constructed when I was alone. I find when I am working alone is when I am most creative and productive. I see myself slowly developing a rhythm of working with clay. For now I can divide the rhythm into four categories: the alone/thinking/cogitating time, the working time, the research time, and the networking/collaborating time. Some of the four overlap, like the thinking and working and the collaborating and research, but they are also separate.


I've noticed there are definite peaks and valleys or ebb and flows in my work, much like the waves of the ocean. As the wave goes up I have just thought of a new idea. When the wave reaches the top I have completed the piece. When the wave is rolling down I am reflecting on the piece on how I might change it, perhaps glaze it differently, but I am also anxious to work on a new piece or new idea - anxious to ride the wave up again. There are also the times when I am thinking or reflecting and not working at all, when the waves are flat as they reach into the shore and roll back out again.


I think when the waves are flat that's my recharge time and that's where I am right now. With the hot weather I have many more garden duties so that also limits my time with clay. I found when I write down how I am feeling, it somehow de-clutters my brain and I am free to create in clay again. So look for some waves of clay coming along in the future.

Friday, May 22, 2009

What's An Olla?


What's an olla? Pronounced oh-ya. It's a large unglazed earthenware pot or jar typically with a bulbous body and narrow neck. Olla were traditionally used to carry, store, and cool water by evaporation. The olla would sweat and thus cool the interior water. (I really want to try this to see how cold the water will get). Many times an olla was made with an indented bottom making it easier to carry the olla on the head.


Ollas were also used in the Southwestern United States to irrigate plants, an ancient drip system if you will. The practice of using an olla to water plants was brought by Spanish settlers and was later adapted by Native Americans. For example the Kwaaymii in the Laguna Mountains east of San Diego made olla from clay they dug (scroll down linked page for a description).


The olla is buried beside a plant or group of plants, leaving part of the neck above ground. The olla is then filled with water. The water slowly seeps out through the pores of the olla and waters the plant. Keeping the water underground is more efficient since there is less evaporation. The plant roots slowly wrap around the olla absorbing the moisture before it can seep into adjacent soil beyond the plant's reach. Ollas can be used in the ground, in raised beds, or even for potted plants (a pot within a pot). Ollas are an excellent way to conserve water especially in water restricted areas.


Ollas are best used for herbaceous plants, grasses, vegetables and perennials. Some wood plant roots may break the olla as the woody roots enlarge over time. Different sized ollas are used for different plants or groups of plants. Small plants or shallow rooted plants need a smaller olla and plants with deeper roots or which need more water need a larger olla. After the olla is buried and filled with water a rock, cap, or cork can be placed over the top to prevent insects and dirt from falling in the pot. A drip system can also be set up to fill the olla automatically.

The flowers are Pandorea jasminoides, or Bower vine, evergreen vines blooming in my garden right now. One has a pale yellow center and the other a ruby center. They bloom sporadically all season long but need a moist, well draining soil and a nearly frost-free climate. The flower is named after Pandora, the first woman, giver of all, of Greek mythology who released all the evils of mankind. Apparently the Greek pithos, large storage jar, was translated to Latin pyxis, box. So Pandora should have released the evils by opening a large storage jar, (perhaps an olla).

Have a relaxing Memorial Day (Decoration Day) weekend. I give these flowers, in rememberance, as if strewn across the graves of those who have fallen, that our nation might be free.

Wednesday, May 20, 2009

Hope They're Perfect But...


A while ago I made balancing circles, two circles and three circles from clay. I stained them with oxides and fired them and they both made it through the firing. Unfortunately someone dropped the three circles on the concrete outside the kiln and it broke, but here you see the two circles balanced upright. These circles will balance, but you've got to have a lot of patience to get them to stand up. The circles aren't perfectly round, but they still work as I intended them. Even though the three circles were broken, I'm glad I have the two circles to show for my efforts.


Here's a bowl from the last firing. Unfortunately a piece of kiln wash has embedded itself right in the middle of the bowl. With this bowl I was experimenting with mason stained slips. I covered the inside with green slip and outside of the bowl with blue slip and bisque fired it. Then I glazed the bowl with a Blue Flambe glaze and fired it to cone 10. The edges of the bowl turned a beautiful deep turquoise. I put two coats of the slip on the edges of the bowl. The outside of the bowl where the glaze was put on thin turned a metallic silver. Even though the bowl isn't perfect I learned glaze applied over slip can give some unexpected color results.


Remember the pillow boxes that cracked at the seam and I patched it with slip? I put the box up on stilts to fire it. The glaze ran and stuck the stilt to the bottom of the box. I was going to heat the glaze up and separate the stilt, but I noticed where I patched the seam with the slip there is a small crack along the outside of the seam, the stress point of the piece. I'm still going to attempt to remove the stilt by heating it with a torch as a practice, in case I have dripping glaze in the future and I want to save the piece. I'm glad I happened to glaze this box with the runny glaze since it was the one that cracked and the other one came out perfect. I am also going to modify the design of the box by adding some feet. Sometimes things happen for the best.


When we lived in Arkansas, we had a huge magnolia tree in our front yard. I still remember shade it provided and the sweet lemony fragrance wafting through the air. When we moved here I decided to plant a magnolia tree, hoping to recapture that memory. Here's the first blossom of the year from the tree I planted four years ago. I had to hold my camera above my head to get a good shot of the flower because the tree has grown four feet since I planted it. The flower isn't perfect. There are insects holes, the stamens have fallen on the petals, and the sun has scorched the petals. But I noticed there are many more blossoms on the tree about to open. So I'm off to the studio to make some things in clay and hope they're perfect, but... if not I'm sure to learn something and I might just recapture a memory along the way.

Monday, May 18, 2009

I Found My Marbles

Clay Marbles by Linda Starr

In my first ceramics class I started experimenting and pushing the limits of the clay from the very beginning, trying different techniques and different types of clay. I was often told that won't work, those will explode, you can't do that with clay, or we don't use that type of clay. But I persisted and I insisted. (I'm a stubborn little cuss after all). At the time I was working with three different stoneware clays - a red, a dark brown, and a tan. I knew little about clay then, I was just attracted to the colors and textures of the different clays.

Clay Marble by Linda Starr

At the end of the semester I had a little bit of each of the three clays left. It seemed I didn't have enough of any one color clay to make anything, but I hated to waste the clay. I thought about combining the three clays into one piece. I made a hand built tray layering the three clays together. Then I noticed I still had a little bit more of each clay left, so I decided to roll the three clays into some marbles. The marbles are solid clay and range in size from 0.5 to 1.5 inches in diameter. Amazingly the twenty-two marbles just fit inside the tray. I couldn't fit another marble in if I wanted to.

Marbleized Clay Tray by Linda Starr
6.25" x 7.25 x 1.75"

When my instructor saw the tray and marbles he explained that different clays shrink at different rates and they might not stay together. I asked him if I could try firing them anyway, and he said OK. I bisque fired them and, much to my surprise, they made it through the bisque. When I was unloading them from the kiln, in my inexperience, I picked up the bisque tray with the marbles inside from the side without supporting it. The side gave way from the weight of the marbles. I was so disappointed I put the tray with the marbles in a cabinet at the college thinking I'd worry about them the next semester.

Marbleized Clay Tray with Clay Marbles by Linda Starr

This year, many years later, I was rummaging around in the cabinets and was happy as a lark to find my marbles and tray at the back of a cabinet on the very top shelf. What a great surprise; sometimes the littlest things bring me such unexpected delight. I decided to fire them to cone 10. When I took them out of the kiln the other day, I saw the tray and marbles made it through the cone 10 firing. They have a rough texture and beautiful colors all blended together randomly.


Gary said the broken side of the tray looks like it has deteriorated over time, like an ancient game of marbles just discovered. This marbleized tray with marbles feels special to me. I guess it is marks a time when I first realized I truly loved working with clay.


I remember I used to love collecting and playing marbles when I was a child. I remember cat eyes, puries, boulders, aggies, and others. I got to thinking about clay and did a search and found out there were actually clay marbles mass produced back in the 1800's in Akron, Ohio. Before that clay marbles were imported from Germany and some of these vintage marbles were called Bennington clay marbles. I learned there is a whole repertoire of marble terminology. I also learned there are folks who now specialize in making contemporary clay marbles.


Wonder what else I can make with three colors of clay, hand blended together? As I was photographing the marbles I noticed they looked nice arranged in a pattern and thought about making some marbled discs or squares and mounting them on a board. As I was looking at the tray I realized I can't even remember how I made the marbled clay. Have you made marbleized clay? How did you go about making it?


My first year working with clay I learned it never hurts to try. This year I again learned, it never hurts to try. I think I'll explore marbleized clay a little further. The flowers are dahlias blooming near my studio.

Sunday, May 17, 2009

Lavender Lemonade


Today was hot; tomorrow is supposed to be hotter, it's supposed to reach 103 F. So I am making some lavender lemonade to help cope with the heat. Lavender does not taste like it's fragrance. It's kind of tangy. You know how when you drink regular lemonade you get some phlegm in your mouth afterwards. Well with lavender lemonade that doesn't happen.

2 tablespoons dried lavender buds
4 cups water
12 lemons juiced or 1 can frozen lemonade
sugar to taste if using fresh lemons

Measure out two tablespoons of dried lavender buds. Meanwhile take two cups of the water and bring it to a boil in a medium saucepan. Once it starts to boil shut the heat off, then stir in the dried lavender buds and let them steep in the water till it is room temperature. Do not boil the lavender buds or they will be bitter.


In the meantime, start squeezing your lemons. I picked mine from our Meyer variegated lemon tree which produced pink lemons. See the tinge of pink on the skin and the pink tint to the inside. You'll need about 12 small or six large lemons for a large pitcher full. If you don't have fresh lemons, don't worry, just use frozen pink lemonade. The pink lemonade is better because the lavender buds turn the water a bit green and no one wants to drink green lemonade, pink is much better. After the lavender water has cooled down, drain the buds off and use this water for half of your lemonade water and then add in the other two cups of water. It's easy and it's good.


If you're feeling adventuresome you can add a little tequila to your lemonade. Have a good weekend.

Friday, May 15, 2009

We Know You're Rich


Purple Bicycle

A couple of years ago Gary was at work and some of the guys he worked with asked him why he was working there. Gary said he needed to work to pay the bills. The guys said, "You don't need to work, you're rich!" Gary said, "No I'm not rich". The guys insisted, "We know you're rich".


Dietes iridioides or fortnight lily

Gary said, "What makes you think I'm rich?". The guys said, "Whenever we drive by your house, we see your gardener outside working". Gary said, "I don't have a gardener". The guys said, "Yes you do, we see your gardener every time we drive by at all times of the day, so we know you have a full time gardener. If you have a full time gardener, you must be rich".


Potter/Gardener with Straw Hat

Gary said, "You must be mistaken, what house are you thinking of?" The guys said, "The one with the lavender garden sign". Gary said, "Yeah, that's my house, but I don't have a gardener". The guys said, "We see the gardener with the straw hat walking all over your property". Gary said, "That's not my gardener, that's my wife". Then Gary said, "Think about it, if I was rich, why would I be working here?" The guys said, "Yeah, I guess you're right".


Not a Gardener with Straw Hat

But hey, I've got a secret to tell you. We have a roof over our heads, a beautiful garden, three great cats, and we have each other, So if you drive by and see someone with a straw hat walking around, you'll know we ARE rich.


Betty, Butter, and Binky
Three Cats, No Straw Hats

Wednesday, May 13, 2009

A Few Results


Teadust Pillow Box by Linda Starr
8" x 5.25" x 4.25"


Fem Bud Vase by Linda Starr
12" x 5.5"


Tenmoku Tea Bowl by Linda Starr
2.75" x 4.5"


Pair of Textured Bowls by Linda Starr
7.5" x 1.75"


Vine Pitcher & Two Cups by Linda Starr
pitcher 9" x 2.5" x 4.5", cups 4.5 " x 2.5"


Just A Window by Linda Starr
7.25" x 8.5" x 1.5"


Jelly Fish by Linda Starr
4.5" x 6.25"

The last firing, gas reduction, cone 9.5, eight hours, slow cool.

Tuesday, May 12, 2009

Friends and Sharing


I've learned something new and profound about clay. I guess I knew it deep down, but it just hit me today. I think the best part of working with clay is sharing and making new friends, and having others share with me. Others who I have met through their blogs and in person, willing to share.

I am so amazed at the willingness of others to share their art and knowledge. And yet I am not so amazed. I, too, get immense satisfaction sharing my love of clay with others, sharing what I make with others, sharing my excitement about clay, sharing what I've learned about clay, and having others do the same. What a wonderful thing. Clay rewards me every day.

A package arrived from Alaska the other day and I was so excited. The package was from Cindy Shake, a very talented metal sculptor. I admired Cindy's Raven on her blog and we came to an agreement to make a trade with each other. That's my Raven you see hanging in my home in a place of honor. My photography doesn't do justice to the piece. Cindy's note said I could hang it outside, but there is no way I'm letting my Raven get exposed to the elements.

When I opened the package Gary looked at the Raven and said, "Wow, that is a beautiful bird, it looks so realistic, and it is so you". You see ravens have been special to me for many years. I even do a raven impression, with their walk and call. (No I'm not doing a video of my impression, you'd laugh yourselves silly).

If you haven't been to Cindy's blog, Artmaking in the North, be sure to check there often, she even incorporates clay features into some of her sculptures. Cindy, thank you so much for my beautiful Raven.

Monday, May 11, 2009

Diana Fayt Workshop


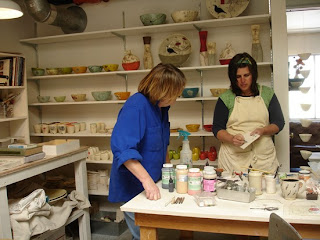
Diana Fayt and workshop participant

What a fun and whirlwind trip I had to San Francisco this past weekend to attend a Diana Fayt workshop at her studio. Light traffic and warm sunny weather made for a picture perfect weekend. As I drove over the Bay Bridge it brought back so many memories from the late 1970's when I lived in San Francisco. I bought my first 35 mm camera from Brooks Camera where I worked for a while, which led me to photography as an artistic medium. I worked with black and white photos for a time, and later did free lance photography and portraits, but my true penchant is for color and landscape photography.


Green ware Tiles by Diana Fayt

In the morning Diana presented us with an overview of print maker surface treatments she has developed which she applies to leather hard clay. The photo above shows some of the techniques Diana demonstrated on her own tiles. The surfaces have a lot of depth and the colors are rich. Diana recommended using a clay with some warm tones in the fired color which ultimately affects the glaze colors. I've experimented with various clays in a reduction atmosphere, but not with oxidation. This summer I'll be firing in oxidation using several different clay bodies. Looks like I have a lot of testing and experimenting ahead of me.


Tiles by Diane Fayt

After Diana's demonstration, we broke for a brown bag lunch and shared our experiences in working with clay. Diana prepared tiles in advance for us all to work on. In the afternoon we practiced the techniques she showed us on the already prepared leather hard tiles. We couldn't wait to start working on our tiles and concentrating on what we learned. Since I got back, my mind has been going a mile a minute on all the different ways I can use these new surface techniques on my own clay pieces. I just can't wait to try some of them. We were all having so much fun the workshop ran over more than an hour.


Display Shelves, Diane Fayt Studio

I was meeting my brother for dinner so I was the first to leave the workshop. When I left the rest of the participants were still working on their tiles. Unfortunately, I neglected to take a photo of the tiles I worked on, which I left for Diana to fire and mail to me. So you'll to wait to see the results of my handiwork, which I will post in a few weeks. A big thank you to Diana Fayt for a great workshop and for expanding my knowledge of clay surface treatments.

If it hadn't of been for a broken irrigation pipe, and lavender farming duties, I would have stayed in the bay area longer. Next time I need to do more planning so I CAN stay longer in San Francisco. As I was leaving I drove by the opera house, and I was reflecting about all the culture I am missing not living in or near a big city. I used to go the ballet, the museums, concerts, the park, the ocean and so many other places. San Francisco really is a great place to visit, with so much to see and do. Well one thing I do have now are many pleasant memories of the 'City by the Bay'.


Sourdough Bread and White Wine with lavender sprig
Ceramic Woven Platter by Linda Starr

I picked up my brother and we went to Fisherman's Wharf for a seafood dinner. While I was there I picked up a loaf of sourdough bread and I couldn't help but think of Ron Slagle and June Perry who recently shared their sourdough bread recipes. When I got home I served Gary some buttered slices of the Fisherman's Wharf sourdough bread I purchased (served on my very own woven platter), along with a glass of white wine.

But wait, what's in the glass of wine?
Hey, it's a sprig of lavender!

A sprig of lavender in white wine is actually quite good. Yes, lavender is edible and it doesn't taste like it's fragrance. When a sprig of lavender is placed in a glass of wine, you can smell the lavender when you raise the glass to drink a sip and it imparts a subtle yet pleasant flavor to the wine. Try it, you might like it. As the weather gets warmer, I'll be making some lavender lemonade and I'll let you know how I make it.


English Lavender

I'm really thankful to all the ceramic artists willing to share their knowledge, tips, and techniques on their blogs. Lots of the posts I read are like little mini workshops. A while ago Ron posted his paper template hand building methods on his blog (there are three parts to his post, the link is for the first in the series). Since I do a lot of hand building, I've used paper templates several times over the last few months. June has a whole repertoire of recipes for stains and glazes on her website. June's recipes were the springboard for the slip and stain experimenting I've done over the last four months.

The bouquet of English lavender above is from my garden. The lavender is blooming a week early this year. Up next are the results of the last cone 10 firing, so stay tuned.

Friday, May 8, 2009

Kiln Too Hot, Off to Workshop


Fem Bud Vase by Linda Starr

The kiln was 165 F this evening and too hot to handle. Everyone was skittish to unload due to the previous fiasco (rightly so), worried about crazing etc. Unloading will be next Tuesday evening. Here are a few pieces I have cooling in the kiln. I did sneak a peak and results look good, didn't have my camera though, sorry.


Window Plaque by Linda Starr


Pillow Box by Linda Starr

Stay tuned for the kiln opening. Meanwhile I am excited to be off to San Francisco tomorrow for a Diana Fayt workshop this weekend. More about the kiln opening and workshop next week.


Here's a rose called Blue Boy which is blooming in my garden right now (my studio is in the background). It's supposed to be a blue rose and does have a blue tone to the color. See you next week.